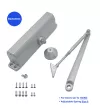
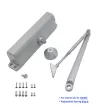
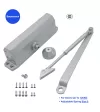
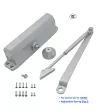
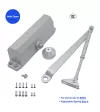
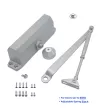
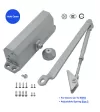
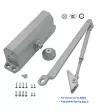
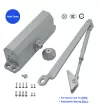
Door closers are divided into exterior-mounted and hidden-type, and the most commonly used is the exterior-mounted type. The more common installation method is: the door closer is installed on the opposite side of the door opening, and the arm of the door closer is about 90 degrees to the door. The body of the door closer is mostly installed on the door frame, unless in extreme cases the upper edge of the door frame is too narrow to fit the body of the door closer, it will be installed on the door leaf. It is also worth noting that the door closer is usually installed on the outward opening door.
First, the installation steps of the door closer:
1. Determine the installation position: According to the instruction manual of the door closer, understand the relevant parameters of the door closer and match the size of the door to determine the installation position.
2. According to the requirements of the door closing force, the door closing force can be changed by reversing the connecting seat 180° or changing the connection position between the connecting rod and the connecting seat. At the same time, the farther the distance from the connecting rod of the door closer to the door hinge, the smaller the closing force required by the door closer, and vice versa.
3. According to the position instruction on the installation template, determine the position of the installation screw, and then drill and tap. Install the door closer body with screws. Install the fixed connector. Install the driver board with screws.
4. Adjust the adjustment rod to 90° with the door frame, and then connect the connecting rod with the drive plate.
5. After the installation is completed, check whether the fixing screws are fastened, and there must be no looseness or infirmity. Open the door to the maximum opening position and check whether the hinged arm of the door closer touches or rubs against the door or door frame.
6. The closing speed of the door closer: There are cross or flat or hexagonal screws on one side of the body of the door closer. This screw directly controls the throttle valve core. It is possible to adjust the closing speed by adjusting this screw.
3. Use, maintenance and repair of door closers
When the newly installed door closer is used for about one week to 10 days, all screws should be checked and re-tightened.
Use the hydraulic oil recommended by the manufacturer, and use hydraulic oil with a low freezing point for cold regions.
The door closer should be inspected regularly after it is put into use. The contents of the inspection are: whether the installation screws are loose or lost, whether the connecting arm rubs against the door body or the door frame, whether the door body is deformed and loose, the cushioning effect of closing the door, and the support guide. Whether the parts are leaking oil, etc.
Usually, the following problems will appear after the door closer is used for a period of time:
1) The mounting screws are loose or lost, resulting in the door closer not being in the correct installation position and the connecting arm being damaged;
2) When the door closer is closed, the cushioning effect becomes poor, resulting in impact between the door and the door frame, and deformation of the door body;
From a structural point of view, the door closer is a closed whole, and its quality is basically invisible from its appearance.
The most critical quality issue of the door closer is whether there is oil leakage, because the door closer relies on the throttling of the fluid in its internal hydraulic system to realize the control of the door closing process. Oil leakage means the failure of the hydraulic system, so the hydraulic system is The only criterion that determines the service life of the door closer. The main cause of oil leakage is that the wear of the pinion supporting guide increases the gap, the wear of the sealing ring causes the sealing effect to decrease, or the throttle spool rotates counterclockwise to leave the valve body when adjusting the buffer effect.
The reduction of the cushioning effect of the door closer is caused by the entry of air caused by oil leakage or the increase of the fit (throttling) gap between the rack plunger guide cylinder and the valve body. Therefore, the quality and precision of pinion, support guide material, heat treatment and machining are very important.
For door closers with poor cushioning effect, throttling by adjusting the throttle spool alone cannot solve the problem fundamentally. Maintenance must be done. If there is oil leakage at the support guide, remove the support guide and check the condition of the seal ring. If it is worn or aging, replace the seal ring. If the gap between the support guide and the pinion shaft is too large, replace the support guide. If the guide cylinder of the rack plunger is worn and the fit gap between the valve body increases and the throttling effect decreases, the rack plunger can be removed and repaired by chrome plating on the surface.



Write a comment